Santa Paws Christmas Card

It's Day 3 of the 12 Days of Christmas Cards and I've got a pawsitively fun one to share with you today! Santa Paws is in the house and spreading Christmas cheer along with his muddy paw prints!

Santa Paws Christmas Card
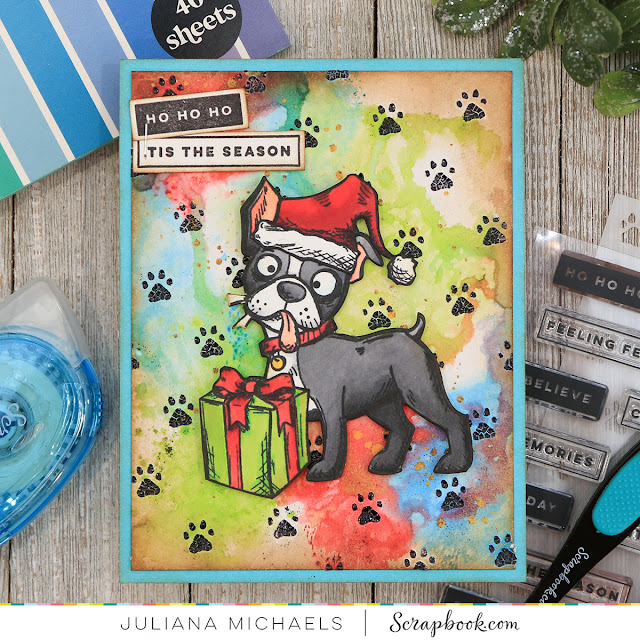
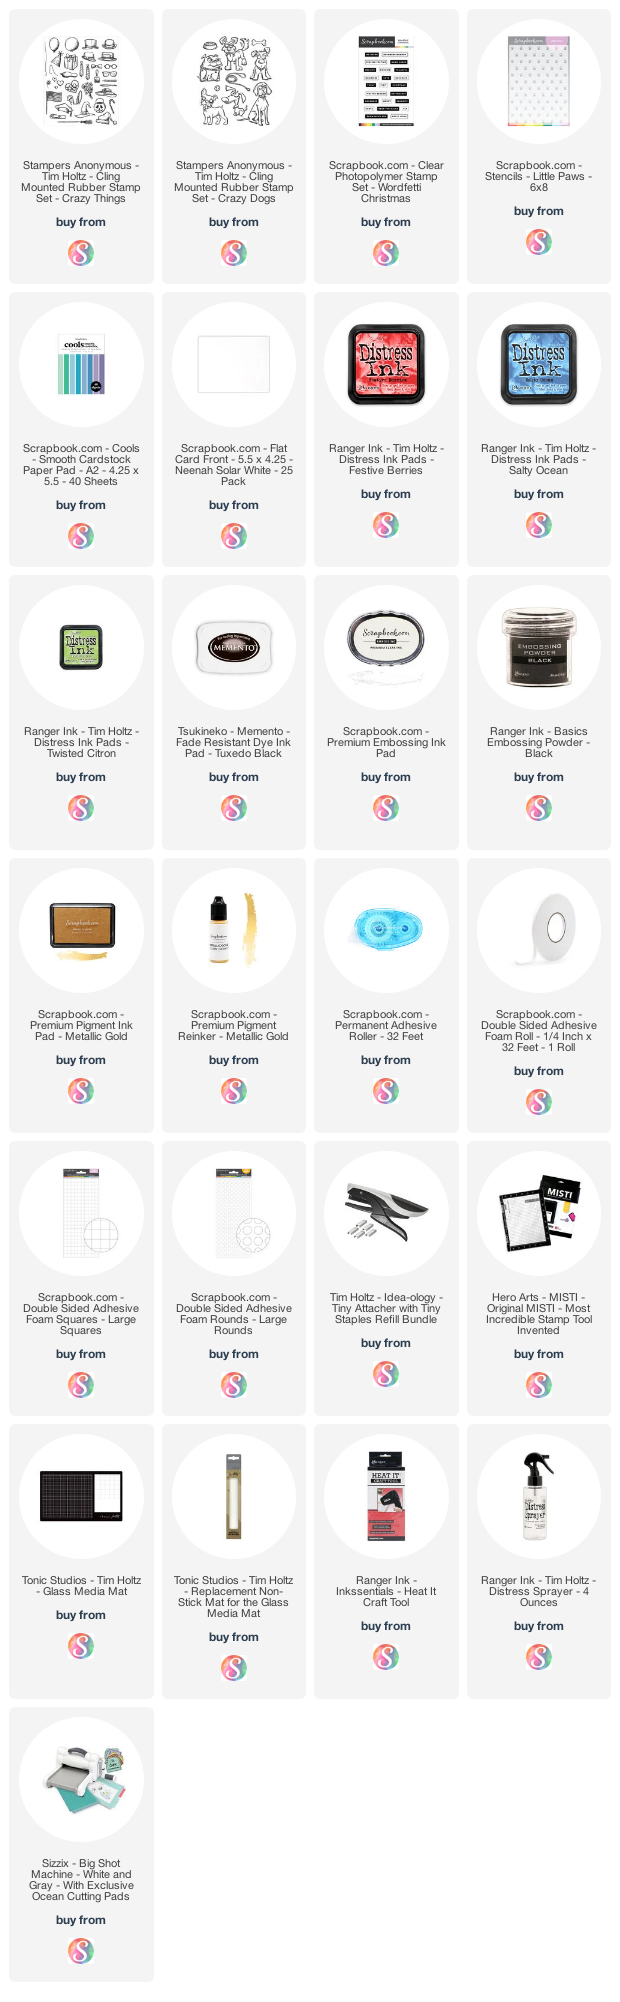
Santa Paws Christmas Card by Juliana Michaels featuring Tim Holtz Crazy Dogs and Scrapbook.com Little Paws Stencil

When I first got my paws on this Little Paws stencil from Scrapbook.com, I knew I wanted to combine it with the Tim Holtz Crazy Dogs and Crazy Things stamp sets to create a Christmas card. I began by creating the background and because I was going to use the Crazy Dogs stamps, I wanted to create a slightly crazy background.

I used the dab and dry technique that I mentioned using for my Day 1 card. This is one of my favorite techniques and you will see that I use it quite often for my backgrounds. Here I used the following Distress Ink colors: Festive Berries, Salty Ocean and Twisted Citron. I love how these colors combined and mixed. When placing these colors onto your craft mat, try to avoid putting the green and red next to each other if you want to avoid turning colors to mud. Once the dab and dry was completed, I inked the edges with a bit of Vintage Photo Distress Ink.


With the paper completed dry, I placed the Little Paws Stencil on top and applied Distress Crackle Paste with a palette knife. This added some fun texture, but you couldn't really see the paws. The help them stand out a lot more, I put the stencil back in place and inked over the stencil with clear embossing ink. I then removed the stencil and sprinkled black embossing powder over the design and heat set it with my heat gun. I absolutely recommend rubbing an anti-static pouch over the entire surface before you attempt this heat embossing step. I've always found black embossing powder to be tricky to work with because it is so hard to remove any stray specks of it. If I had to do this over, I would use a black pigment ink instead of the clear embossing ink and then use a clear embossing powder.

The final step for the background was some ink splattering using the Scrapbook.com Metallic Gold Premium Pigment Ink Reinker. I squeezed out some of the ink onto my craft mat, spritzed it with a little water and then used a paint brush to splatter the ink onto the paper.


For the Crazy Dog, I stamped the dog image, present and hat (which are from the Crazy Things Stamp Set) onto Neenah Cardstock using Memento Tuxedo Black Ink. After coloring them Copic Markers I fussy cut each of the images and then inked the edges with a black marker. To give the images some dimension, I adhered them using Scrapbook.com Double Sided Foam Adhesive. Scrapbook.com sells this in a wide variety of pre-cut shapes such as strips, rounds, squares and even rolls that you can cut yourself.


To finish off the card, I stamped the sentiments from the Wordfetti Christmas Stamp Set using black ink onto white cardstock. I then inked the edges with some Vintage Photo Distress Ink and attached them using a Tiny Attacher. I then layered the card front onto a piece of blue cardstock from the Scrapbook.com 

Thanks so much for stopping by for Day 2 of my 12 Days of Christmas Card Ideas. If you happened to miss it, I invite you to visit Day 1 and check out the Merry Christmas Santa Card I shared.

Supplies

You can find a supply list of the products I used to create this project below. This post contains compensated affiliate links to Scrapbook.com at no cost to you. If you want to learn more about what an affiliate link is, you can see my full affiliate and product disclosure statement here. Thank you so much for your support!
Joy To The World Christmas Card | Tim Holtz Bold Tidings

Hello friends! Welcome to Day 2 of the 12 Days of Christmas Card Ideas here at 17turtles! Today I'm sharing a bit of Joy to the World with a card featuring the Tim Holtz Bold Tidings Number 2. This stamp set is part of a series of 4 stamp sets that contain a combination of holiday sentiments in a large bold font that are perfect for creating the focal point of your card.

Joy to the World Christmas Card

Joy to the World Christmas Card by Juliana Michaels featuring Tim Holtz Bold Tidings Stamp Set

For this card, I began by stamping the background with the music note image from The Poinsettia stamp Set using Vintage Photo Archival Ink.


Next, I used a stamp positioning tool to stamp the Bold Tidings sentiment with Peeled Paint Archival Ink. 


After stamping the sentiment, I decided I wanted to help it stand out a bit more by adding some heat embossing. I rubbed over the paper with an anti-static pouch and then stamped the sentiment with embossing ink and heat embossed it with Peeled Paint Embossing Glaze.


To continue with the background, I used the dab and dry ink layering technique to distress the paper. With this technique, you smoosh your ink pad onto your silicone craft mat, spritz the mat with water, dab your paper into it, dry it and then repeat until you are pleased with the look. Tim Holtz recently shared this technique during his Fall Vibes Facebook Live.


I used a combination of Old Paper and Vintage Photo. You might wonder why I didn't do the background first. Well, to be honest, I wasn't sure what I wanted to do, so you could certainly do this background technique first and then do the stamping and heat embossing later.


Once the background was completed, I inked the edges with Vintage Photo and Gathered Twigs Distress Ink and then added some machine stitching to the outside edge.


For a bit of texture and interest, I added a cluster of die cuts using the Holiday Greens Mini Thinlits cut from various colors of Classic Kraft Stock.

To the center of this I added a Christmas token distressed with Mushroom Alcohol Ink.


I then finished off the card with a red twine bow.


Thanks so much for stopping by for Day 2 of my 12 Days of Christmas Card Ideas. If you happened to miss it, I invite you to visit Day 1 and check out the Merry Christmas Santa Card I shared.

If you are planning to do any card making supply shopping, I wanted to let you know that the Holiday Festival is happening now at Scrapbook.com! Shop and SAVE on Holiday, Winter, December Days, Christmas, and Seasonal Themes! This sale only lasts through Monday, November 9th at midnight MST, so stock up today! They also have an amazing FREEBIE available today. So make sure you stop by and check it out!

Supplies

You can find a supply list of the products I used to create this project below. This post contains compensated affiliate links to Scrapbook.com at no cost to you. If you want to learn more about what an affiliate link is, you can see my full affiliate and product disclosure statement here.

12 Days of Christmas Card Ideas | Vintage Santa Christmas Card

Hello friends and welcome to Day 1 of my 12 Days of Christmas Card Ideas! I'm excited to share a variety of tips, tricks and techniques with you over the next 12 days to help inspire your Christmas card and tag crafting. 

Vintage Santa Christmas Card

Today I'm starting off with this Vintage Santa Christmas card featuring one of my favorite stamp sets from this year...Vintage Holidays by Tim Holtz. I'm always a sucker for anything with a Santa and then when you combine that with a mix of other vintage images I'm sold! 

For this card, I stamped the Santa image with Memento Ink in Tuxedo Black onto Neenah Classic Crest Cover Solar White 110lb paper. I then colored the image using Copic Markers. Once the coloring was completed, I fussy cut the image. Anytime I fussy cut a stamped image, I alway color the edges of the paper using a black marker. You can use a black Copic Marker or even a Tombow marker as they both have tips that allow you to get into small spaces. I recommend holding the fussy cut image and coloring with the backside facing you. This way you are much less likely to accidentally mark up your colored image. To give the image a more vintage feel, I added Glossy Accents to the trim on Santa's hat and suit and then sprinkled it with Distress Stickles Clear Rock Candy Dry Glitter. Once this was dry, I inked the edges with Vintage Photo Distress Ink for an even more aged look.

Vintage Santa Christmas Card by Juliana Michaels featuring Tim Holtz Vintage Christmas Stamp Set

For the background, I repeat stamped each of the fun label strips from the Vintage Holidays Stamp Set onto white cardstock using Archival Ink in Peeled Paint, Faded Jeans, Vintage Photo and Barn Door. I then cut each strip, distressed the edges using the back side of my craft knife and then inked them with Vintage Photo Distress Ink. 


The finished size of this card is 3.5 x 6 inches. This size, in the card making world, is being referred to as a mini slim line card. It's a new to me size, and a lot less intimidating than a full slimline card which measures 3.5 x 8.5 inches. To create the card front, I cut a piece of red cardstock to 3.5 x 6 inches. I then trimmed a piece of computer paper to 3.25 x 5.75 inches and adhered the label strips in a diagonal along this piece of paper until the entire piece was filled. By using computer paper, I cut down on the thickness of the card which is helpful if you plan to mail your cards.


To finish off the card, I added a sentiment from the Tiny Text Christmas Stamp Set. I stamped this with embossing ink onto black cardstock and then heat embossed it with white embossing powder.


I hope you enjoyed learning how this Merry Christmas Santa card came together. Make sure to stop back by tomorrow for more inspiration on Day 2 of my 12 Days of Christmas Card Ideas.


If you are planning to do any card making supply shopping, I wanted to let you know that the Holiday Festival is happening now at Scrapbook.com! Shop and SAVE on Holiday, Winter, December Days, Christmas, and Seasonal Themes! This sale only lasts through Monday, November 9th at midnight MST, so stock up today!

Supplies

You can find a supply list of the products I used to create this project below. This post contains compensated affiliate links to Scrapbook.com at no cost to you. If you want to learn more about what an affiliate link is, you can see my full affiliate and product disclosure statement here.

Season's Greetings Christmas Card | Tim Holtz Stampers Anonymous Christmas

Season's Greetings friends! With Halloween behind us, I'm now in full on Christmas crafting and sharing mode. I'm starting off today by sharing this Season's Greetings Christmas Card I made for the Tim Holtz Stampers Anonymous 2020 Christmas Release.

Season's Greetings Christmas Card by Juliana Michaels featuring Tim Holtz Poinsettia

The card features the beautiful The Poinsettia Stamp Set. I started with a piece of Bristol Smooth paper. I smoosh and dip technique by smooshing Vintage Photo and Old Paper onto my craft mat. I spritzed the ink with water and then dipped my paper into the ink. Flipped it over and dried it with my heat tool. I repeated this until I was pleased with the look. Then I spritzed on some more water and did a mix of drying with my heat tool and dabbing the water droplets with a paper towel. I then stamped some of the images from The Poinsettia Stamp Set using Vintage Photo Distress Ink. 

Next, I stamped the poinsettia using Black Soot Archival Ink. I used this ink because I knew I was going to watercolor the image and I wanted to make sure the ink wouldn't bleed from the water. I then water colored the image using a waterbrush and Distress Ink in Fired Brick and tiny bit of Fossilized Amber for the center.

With the background completed, I started on the sentiment. Here I stamped the sentiment from the Christmastime 3 Stamp Set onto vellum using embossing ink. I then heat embossed it with gold embossing powder. Because adhesive tends to show through vellum I used my sewing machine to add a border around the card panel while also using it to hold the sentiment piece in place. 

Supplies

You can find a supply list of the products I used to create this project below. This post contains compensated affiliate links to Scrapbook.com or Simon Says Stamp at no cost to you. If you want to learn more about what an affiliate link is, you can see my full affiliate and product disclosure statement here.

25 Days of Christmas Tags | Sunny Studio Stamps

Hello friends! I'm super excited to once again be joining Tracy McNeely's annual 25 Days of Christmas Tags and you can find all the details here. Each of the 25 days, starting today November 1, Tracy will be sharing a different sponsor, inspiration from their design team AND an awesome prize being given away by that sponsor. Today it's Sunny Studio Stamps day to be featured and they are giving away a $25 gift code!


For the set of tags I made I used two of my favorite stamp sets because they feature Santa and I'm always a sucker for a cute Santa!  The stamp sets I used are Santa Claus Lane and North Pole Stamp Set by Sunny Studio Stamps.


I used the Build A Tag 2 Dies to make the base for each tag. I used the scalloped edged die to cut patterned papers from the Holiday Cheer 6x6 Paper Pad in a mix of green patterns.


Next, I stamped all the images and colored them with Copic Markers. Once the coloring was completed, I die cut them using the coordinating die sets. To finish off each tag, I added a length of red and white twine.


Thanks so much for stopping by today and don't forget to check out the inspiration from the rest of the Sunny Studio Design Team over on the 25 Days of Christmas Tags!

Supplies

You can find a supply list of the products I used to create this project below. This post contains compensated affiliate links to Scrapbook.com or Simon Says Stamp at no cost to you. If you want to learn more about what an affiliate link is, you can see my full affiliate and product disclosure statement here.
Subscribe